Petzl RAD Line Review

screenshot-2019-05-23-at-10.05.01.png

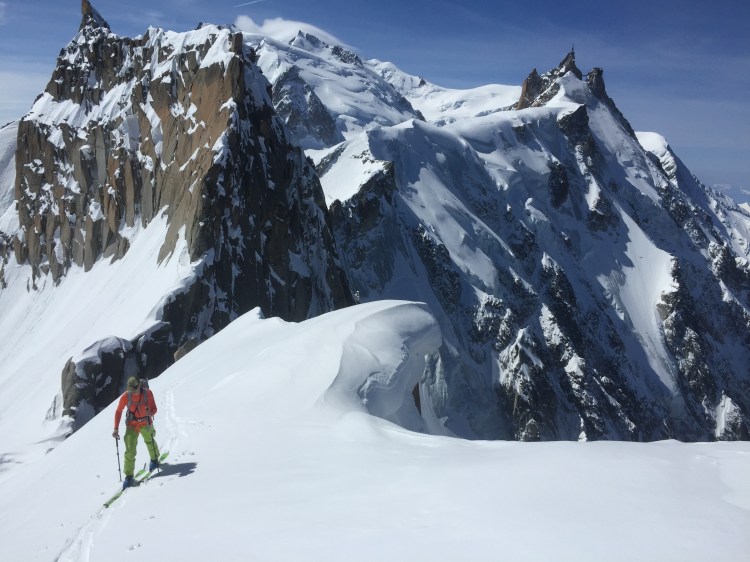
Ross Hewitt skiing the North Face of Aiguille du Plan – 60 m RAD line body coiled. 

In 2016 Petzl recently released the RAD (Rescue And Descent) line rope which is  a lightweight rope that can be used with other components of their RAD system for glacier travel, crevasse rescue and abseiling down cliffs. While I’d used skinny 5.5 mm spectra or dyneema abseil ropes for many years before that, they had severe limitations as the sheath wasn’t bonded to the core, making them a dubious proposition at best for crevasse rescue scenarios.

The RAD line is a 6mm static rope that is made from high modulus polyethylene (Dyneema), aramid (a heat resistant synthetic fibre) and polypropylene.  The sheath is bonded to the core so it can be clamped and climbed.

RAD Line Specification

  • Material: Dyneema, Aramid, polypropylene
  • Diameter: 6 mm
  • Weight/m: 22g/m versus 37-42g/m for 8mm+/- dynamic half ropes – approx 50%
  • Weight 30m/60m: 660/1320g
  • Type: static (elongation less than 2%)
  • Certification: CE EN 564

Out of the box it is instantly apparent that the RAD lines are supplied without a middle mark, something I quickly rectified with a Petzl rope maker. I use a Reverso combined with a Prussic for abseiling.  The reduced friction of the small diameter rope without a Prussic in the Reverso is notable. I try to avoid Italian hitches at all cost because they wear your ropes sheath and also induce twist in the rope.

Screenshot 2019-05-25 at 20.22.13

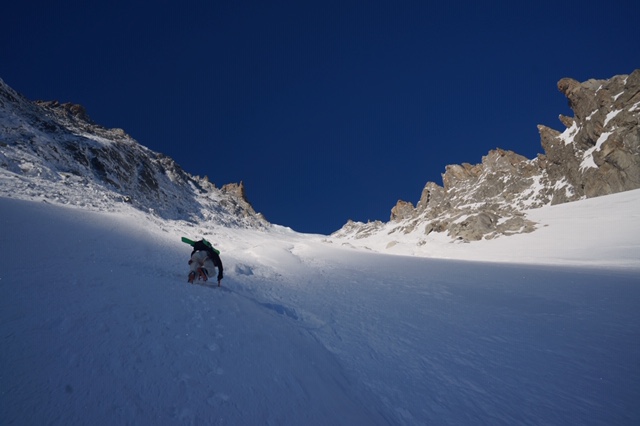
Tof Henry rappelling with 60 m RAD line into the Couloir of Col du Plan

One trait the small diameter ropes have is their tendency to get in a tangle and putting them in a rope bag with save you a half hour of frustration every time. By tying the bag to the second end of the rope means the bag can be thrown to get the rope set on the line of an abseil efficiently in seconds, even if the wind is blowing up the line. My 60 m line didn’t come with a bag but I made one from an Exped inflatable mattress stuff sac. I can’t stress how essential these are and how often I see people in Chamonix with a bunch of knitting to sort out.

IMG_1673

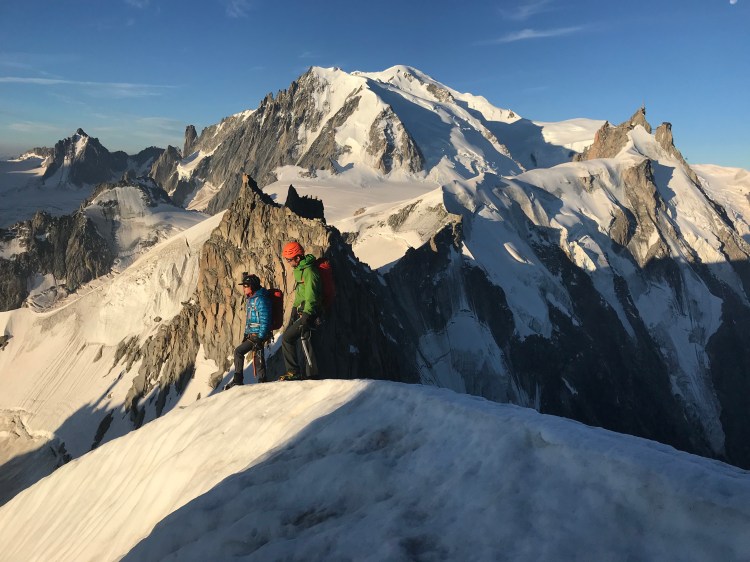
Getting ready for a big mission with the 30 m RAD line in its bag. Photo: Ross Hewitt

When rappelling or undertaking a rescue, a static line is great as there’s very little stretch to pull out the rope making it much more efficient.  The flip side to this is the force of a fall is not reduced by the stretch which means that the system experiences a high force over a short duration in a fall scenario. Petzl testing indicates that there is a slightly better chance of arresting a crevasse fall with a static rope as the load is more predictable without a second pull, however falls on rock or during a rescue could be bad on a static rope.

The RAD line is a brilliant go to piece of kit that has served me well over the last years with its low weight meaning I often have a 60 m version in my pack. I’ve just bought a BEAL Escaper so it will be interesting to try that out and effectively half the rope required for certain abseils. Understanding it is static and the loading effect on anchors is important and its worth reading up Petzl’s tech tips here.

The complete RAD system comprises:

  • RAD Line (basically a 30m or 60m x 6mm static cord)
  • Micro Traction (a low-friction pulley/rope clamp)
  • Tibloc (lightweight/basic rope clamp)
  • 3 x Attache 3D Carabiners
  • 120cm dyneema sling
  • A rope bag with ice screw sleeve

Petzl Altitude Ultra Light Harness Review

IMG_5229

In 2016 Petzl launched its ultra light range of ski mountaineering and alpinism gear which comprise Gully axes with technical picks, 6 mm RAD line for glacier use, the Irvis Hybrid  and Leopard crampons, and the Altitude harness.

Screenshot 2019-05-25 at 17.48.59

Petzl’s Altitude harness was designed explicitly with light weight (150g) and pack size in mine. Its ‘wireframe’ construction is the key to its weight and low profile design. If there is any doubt if a harness is required there is no reason to leave it at home. It has an integrated belay loop making it easy to set up your cow’s tail and prussic for abseiling and anchoring to the belay. The leg loops have plastic closures so the harness can be donned with crampons or skis on and each loop has a silicone lined ice screw hold to stop you screws swinging around and while skiing and having the edge taken off the threads. A metal safety type buckle makes adjustment at the waist easy. Originally the harness had 4 vertically orientated thin tape loops for gear which I hated. Gear would bunch up and the tape loops would always catch in the gate. More than once I dropped a piece of gear because of difficulty in racking it. Thankfully Petzl have rectified this in the latest version with conventional gear loops.

d48d2332-3a0d-4e77-81da-64268c4c30ff

I’ve used this harness since it launched in 2016 and durability is very good. It’s comfortable to wear all day ski mountaineering or lightweight easy alpinism but if I’m doing a route with hanging belays or a pitched climbing I will take a Sitta harness instead. One thing I noticed is the stiffness of the material might mean the leg loops catch when take strides but proper adjustment sorts this out.

IMG_7302

To summarise this is a great lightweight harness for suited to ski-mountaineering, light alpinism and expeditions. It also comes with a stuff sac to keep it compact in your pack and there are 3 size options.

593a7cc2-0bce-4ec6-8294-f36825e22f06


Petzl Irvis Hybrid Crampon Review

d48d2332-3a0d-4e77-81da-64268c4c30ff

Running out the rope between spike belays guiding Breche Tacul. Photo Sam Burrell

Petzl’s dedicated ski mountaineering crampons series have been around a couple of years now which is more than long enough to test new technology and its durability. Petzl took a new approach connecting the steel front and aluminium rear sections of the crampon with dyneema rope or Cord-Tec in Petzl speak. This not only reduces weight but its main advantage lies in the ability to fold the crampons in half and reduce the overall pack size. Getting everything to pack down smaller is the holy grail and means my 27-32 litre pack works for everything from technical Chamonix day hits to 6 days hut to jut touring through the Alps. A compact pack brings its centre of gravity close to my back. The closer its centre of gravity is to my own reduces the lever on my core muscles and helps me ski faster, longer, better.

T02A-LLU-IRVIS-HYBRID-focus-2_LowRes

Compact Pack Size. Photo Petzl

The combinqtion of steel toe piece and lightweight heal piece is perfect for ski mountaineering where you might be climbing up a alpine face and encounter some hard black ice or need to negotiate some sections of rock scrambling. The spec weight is 570 g with the anti-snow plates fitted. They come with both a wire and universal front bail so fit boots in the B2 & B3 categories.

DSC00726

Col de la Verte. Photo Koen Bakers

Out of the box I set my crampons up on my boots and went out ski touring in Arolla. We ended up climbing along a prolonged rocky ridge and after a while I noticed the toe piece had a tendency to yaw or skew to the side – something a traditional crampon can’t do due to the torsional rigidity of the bar. I then realised the dyneema had ‘bedded in’ to its working length and I just needed to adjust the tension up. You can do this at home with the crampons fresh out the box, putting them on and off the boot and tensioning using the dyneema hooks at first then micro adjusting by moving the heal bail a notch further forward.

IMG_0481

Ross Hewitt Climbing Col de la Verte. Photo Drew Tabke

IMG_0506

Ross Hewitt Skiing Col de la Verte. Photo Drew Tabke

So I’ve used these on everything from climbing the 700 m 50/55 degree Col de la Verte ice face, guiding Dent Blanche and the Matterhorn or climbing fast and light alpine routes like the Peigne, Pelerins, Deux Angle, Plan, Midi traverse. They are utterly brilliant and the dyneema stands up to all the abuse you can throw at it, being extremely abrasion resistant. After 2 years with around 400 days on the mountain, the aluminium heal has worn more than the dyneema so there are no worries about how robust these crampons are. I was particularly impressed with the quality of the steel and only recently sharpened them for the first time in preparation for skiing the North face of the Aiguille du Plan. In winter I used them on ski boots with the wire and in summer on the new fast and light Scarpa Ribelles with the universal bail. They are light enough so I only take the full aluminium Leopard crampons if I know I’m only going to travel over snow.

IMG_1074

Traversing Peigne, Pelerins, Deux Angles, Plan, Midi. Photo Andrew Wexler

Unlike most crampons which are asymmetric, these crampons are identical except for the position on the buckle which would conventionally be on the outside of your foot. However, for steep skiing I put this on the inside as the body doesn’t not bend that well to do up crampon straps on the outside while hanging onto steep faces!

IMG_2864

Ross Hewitt Guiding Dent Blanche. Photo Tim Neill

20517451_10155763836608984_752614314_o

Gear for glacier approaches to rock routes at Envers des Aiguilles


Hydrapak Soft Flask Review

IMG_4768IMG_4588IMG_2864

In a world where weight and packsize is becoming everyone’s current obsession, reviewing every item you carry and evaluating its necessity has become the norm. These days I use a 27 l Dorsa pack for 6 day hut to hut touring where 15 years ago it would have been 35 l. For years the near unbreakable nalgene was the go to water carrier but a rigid litre bottle does take up a lot of space in your bag. While bladders with hoses have their place, their use in the Alpine environment often lets you down as fluids freeze in the hose and they become frustratingly unusable. Enter the soft flasks into the marketplace.

The concept is simple, make a flask robust, flexible and compressible and once its empty it takes up very little room. Ideal for packs or even if you head out for a run with one in your hand that can then be stuffed in a pocket once its empty. I’ve used these for all sorts of stuff from alpinism, guides tests, hard multipitch rock, cycle tours, skiing and running and even on expedition on Baffin Island. They are pretty robust and in all that time Ive only punctured one, and in the same period the rough treatment my kit gets has caused two nalgenes to crack.

Hydrapak also make these flasks under the Salomon brand name but one of the features I love about the Hydrapak own brand ones is a lockable nozzle. If  you are like me and avoid surgery gels, take your on hill booster in the form of expresso macchiato in a 150 ml flask and avoid milk leaking in your pack and going off. If you are a gel person then a few gels can be decanted into a 150 ml flask and you avoid the mess of empty gel packaging and that oozing sticky mess in your pockets.  I also use a 250 ml if I’m only out for an hour or two and have a couple at 500 ml and a 1 l flask to cover all types of adventure. One minor downside is they are only rated for 60C so if you like your drinks really hot then you’ll have to take a thermos which will keep them warm longer anyway. I’m not too fussed by hot drinks on the hill and often mix the Marche tea from the refuges with some cold water just so I have a caffeinated drink with me. These are truly brilliant pieces of kit and a must have.

Julbo Chamonix Sunglasses Review

Last month I received a pair of Julbo Chamonix glasses through the post to review.

Julbo was created by Jules Baud in 1888 and founded in the Jura Alps just North of Geneva in a response to requests by the Chamonix crystal hunters need for optical protection from the harsh radiation at altitude.

To this day Julbo has continued to design wicked sunglasses to protect mountain users while branching out into other sports such as sailing and mountain biking which have their own unique demands for protecting your priceless eyesight.

In the 1950s Julbo produced the Vermont glacier glasses and the design went on to become a classic adopted by rockstars and climbers, and a collectors item.

1970s heralded the dawn of professional mountaineers and by that I mean athletes doing routes rather than mountain guides. Yannick Seigneur was an engineer and a product of the grand ecoles. His parents disapproved of mountaineering and it wasnt until his mid 30s that he went full time into mountaineering with an incredible resume of 8000 m peaks in the Himalaya as well as a legacy of new routes around Chamonix.

To this day Julbo continues to be a small family run business with a big heart and passion for what they do. On any given day I might end up rubbing shoulders, ski a line or working with many of the Chamonix stars that are supported by this brand. Vivian Bruchez, Sam Favret, Valentine Favre, Glen Plake to name but a few. World Champions to powder whores like myself.

So when I opened the package I wasn’t surprised to find a timeless classic design glacier glass that has evolved from the original Vermont 1950 edition. Construction quality is to Julbo’s highest standards with metal frames and category 4 glass mirrored lenses to combat radiation up high. White leather baffles stop anything getting around the side.  Rubber nose pads and temple tip/earpieces so these babies will never slide down sweaty noses when you look down and spot your feet.

I took mine guiding to the roof of Europe, Mont Blanc. These sunnies are light despite the glass and I had no issues with soreness on the arch of the nose and after a long day on the mountain my eyes were free from the ache of overexposure to the sun. They are robust too, a wildly gesticulating Italian guide knocked mine for six straight off my head in the refuge – no problem!

So they do what they are supposed to but the thing I like the most is strip off the leather baffles and you basically have, dare I say it, a Ray Ban Aviator for looking cool round town or driving your car. I’ve fallen in love with these in a world where plastic frames and glasses have dominated for so long.