Petzl Irvis Hybrid Crampon Review

d48d2332-3a0d-4e77-81da-64268c4c30ff

Running out the rope between spike belays guiding Breche Tacul. Photo Sam Burrell

Petzl’s dedicated ski mountaineering crampons series have been around a couple of years now which is more than long enough to test new technology and its durability. Petzl took a new approach connecting the steel front and aluminium rear sections of the crampon with dyneema rope or Cord-Tec in Petzl speak. This not only reduces weight but its main advantage lies in the ability to fold the crampons in half and reduce the overall pack size. Getting everything to pack down smaller is the holy grail and means my 27-32 litre pack works for everything from technical Chamonix day hits to 6 days hut to jut touring through the Alps. A compact pack brings its centre of gravity close to my back. The closer its centre of gravity is to my own reduces the lever on my core muscles and helps me ski faster, longer, better.

T02A-LLU-IRVIS-HYBRID-focus-2_LowRes

Compact Pack Size. Photo Petzl

The combinqtion of steel toe piece and lightweight heal piece is perfect for ski mountaineering where you might be climbing up a alpine face and encounter some hard black ice or need to negotiate some sections of rock scrambling. The spec weight is 570 g with the anti-snow plates fitted. They come with both a wire and universal front bail so fit boots in the B2 & B3 categories.

DSC00726

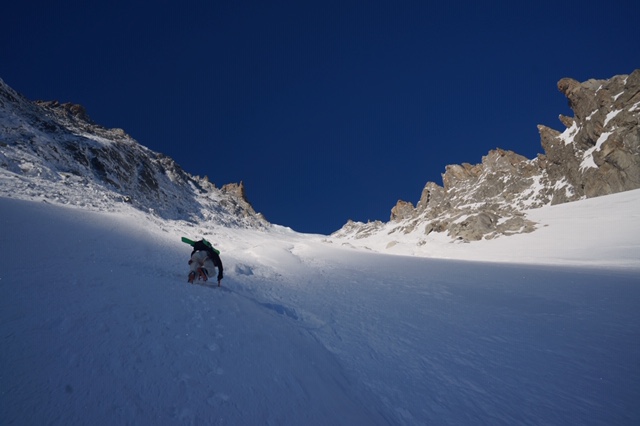
Col de la Verte. Photo Koen Bakers

Out of the box I set my crampons up on my boots and went out ski touring in Arolla. We ended up climbing along a prolonged rocky ridge and after a while I noticed the toe piece had a tendency to yaw or skew to the side – something a traditional crampon can’t do due to the torsional rigidity of the bar. I then realised the dyneema had ‘bedded in’ to its working length and I just needed to adjust the tension up. You can do this at home with the crampons fresh out the box, putting them on and off the boot and tensioning using the dyneema hooks at first then micro adjusting by moving the heal bail a notch further forward.

IMG_0481

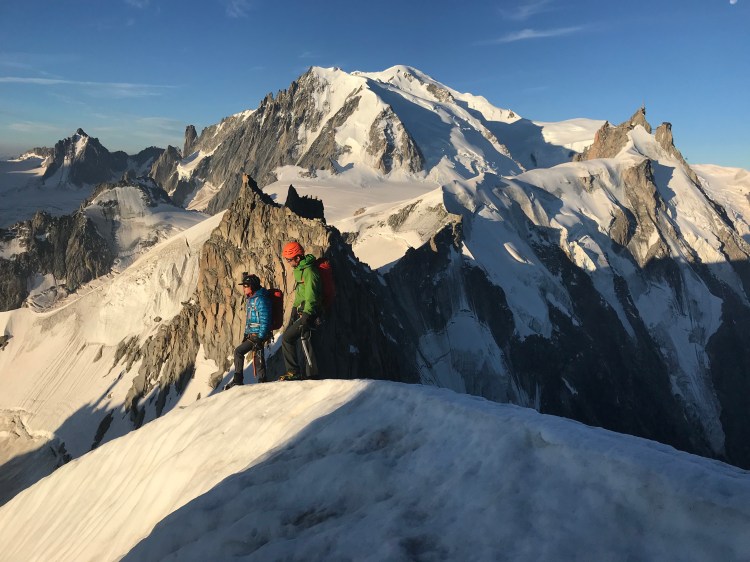
Ross Hewitt Climbing Col de la Verte. Photo Drew Tabke

IMG_0506

Ross Hewitt Skiing Col de la Verte. Photo Drew Tabke

So I’ve used these on everything from climbing the 700 m 50/55 degree Col de la Verte ice face, guiding Dent Blanche and the Matterhorn or climbing fast and light alpine routes like the Peigne, Pelerins, Deux Angle, Plan, Midi traverse. They are utterly brilliant and the dyneema stands up to all the abuse you can throw at it, being extremely abrasion resistant. After 2 years with around 400 days on the mountain, the aluminium heal has worn more than the dyneema so there are no worries about how robust these crampons are. I was particularly impressed with the quality of the steel and only recently sharpened them for the first time in preparation for skiing the North face of the Aiguille du Plan. In winter I used them on ski boots with the wire and in summer on the new fast and light Scarpa Ribelles with the universal bail. They are light enough so I only take the full aluminium Leopard crampons if I know I’m only going to travel over snow.

IMG_1074

Traversing Peigne, Pelerins, Deux Angles, Plan, Midi. Photo Andrew Wexler

Unlike most crampons which are asymmetric, these crampons are identical except for the position on the buckle which would conventionally be on the outside of your foot. However, for steep skiing I put this on the inside as the body doesn’t not bend that well to do up crampon straps on the outside while hanging onto steep faces!

IMG_2864

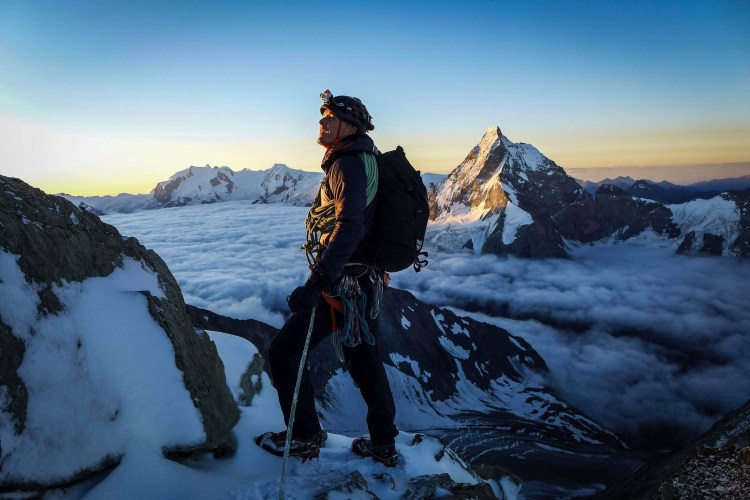
Ross Hewitt Guiding Dent Blanche. Photo Tim Neill

20517451_10155763836608984_752614314_o

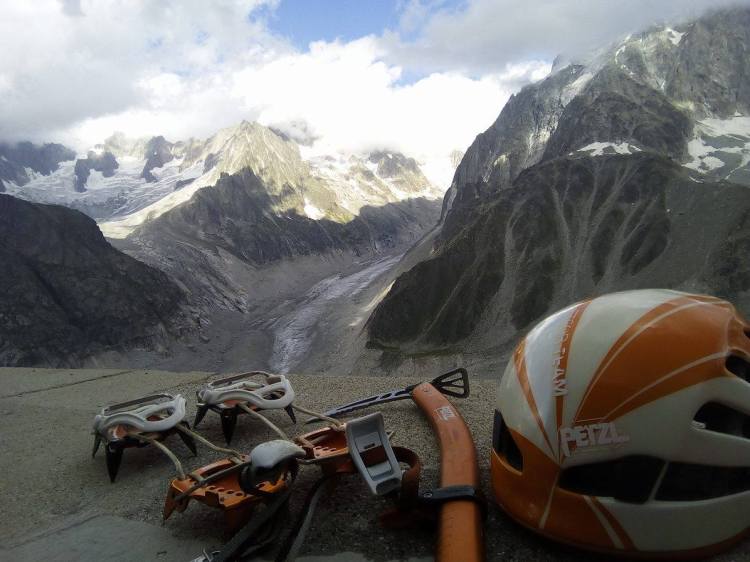
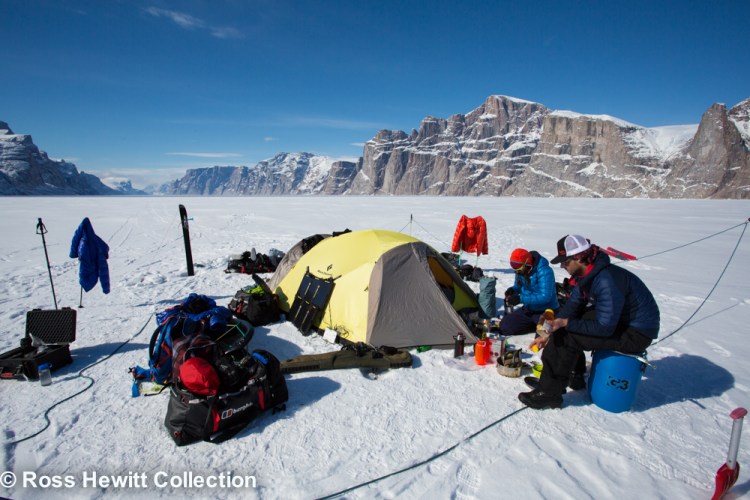
Gear for glacier approaches to rock routes at Envers des Aiguilles


Hydrapak Soft Flask Review

IMG_4768IMG_4588IMG_2864

In a world where weight and packsize is becoming everyone’s current obsession, reviewing every item you carry and evaluating its necessity has become the norm. These days I use a 27 l Dorsa pack for 6 day hut to hut touring where 15 years ago it would have been 35 l. For years the near unbreakable nalgene was the go to water carrier but a rigid litre bottle does take up a lot of space in your bag. While bladders with hoses have their place, their use in the Alpine environment often lets you down as fluids freeze in the hose and they become frustratingly unusable. Enter the soft flasks into the marketplace.

The concept is simple, make a flask robust, flexible and compressible and once its empty it takes up very little room. Ideal for packs or even if you head out for a run with one in your hand that can then be stuffed in a pocket once its empty. I’ve used these for all sorts of stuff from alpinism, guides tests, hard multipitch rock, cycle tours, skiing and running and even on expedition on Baffin Island. They are pretty robust and in all that time Ive only punctured one, and in the same period the rough treatment my kit gets has caused two nalgenes to crack.

Hydrapak also make these flasks under the Salomon brand name but one of the features I love about the Hydrapak own brand ones is a lockable nozzle. If  you are like me and avoid surgery gels, take your on hill booster in the form of expresso macchiato in a 150 ml flask and avoid milk leaking in your pack and going off. If you are a gel person then a few gels can be decanted into a 150 ml flask and you avoid the mess of empty gel packaging and that oozing sticky mess in your pockets.  I also use a 250 ml if I’m only out for an hour or two and have a couple at 500 ml and a 1 l flask to cover all types of adventure. One minor downside is they are only rated for 60C so if you like your drinks really hot then you’ll have to take a thermos which will keep them warm longer anyway. I’m not too fussed by hot drinks on the hill and often mix the Marche tea from the refuges with some cold water just so I have a caffeinated drink with me. These are truly brilliant pieces of kit and a must have.

Lenz Heat Sock Review

During the 2016 winter I was preparing for a spring ski mountaineering expedition to the north east fiords of Baffin Island. Situated deep within the Canadian Arctic, this area has granite walls that soar up to 1500 m out of the frozen fiords. Where there are diagonal weaknesses between the walls is where you find the couloir skiing. The team will be dropped into the fiords by snow machine and from that point onwards we will operate on our own for 3 weeks; skiing, eating and sleeping from a tent on the ice. With temperatures there regularly in the -20C range and dipping as low as -40C, its important to test all equipment thoroughly beforehand. I had been to this area before and found that the sea ice acts like a heat sink sucking the heat out of your feet and legs, which became a constant worry to stop my toes freezing. The nearest helicopter is 3000 miles away in Halifax so rescue is not straightforward or fast. For this trip I chose the Lenz Heat Sock 1.0 combined with the most powerful battery option (RCB1800) to help keep my feet warm, using solar charging systems to recharge the battery at night.

When I received the socks I wanted to test them with my ski touring boots and get used to operating them. The product is well made with the high quality you would expect. Out of the box the batteries were partially charged and only took a few hours to fully charge.

Baffin Berghaus Black Crows Ski Mounatineering Expedition-33

Marcus Waring and Michelle Blaydon in Gibbs Fiord, Baffin

Baffin Berghaus Black Crows Ski Mounatineering Expedition-46

Michelle Blaydon in Crosshairs Couloir, Baffin Island


Before Christmas there was only 50 cm snow in the Alps, just enough to get around on the glaciers in the high mountain. With low avalanche risk we were ski touring a lot and managed a trip to the beautiful old Couvercle refuge in the Talefre Basin. This coincided with the full moon so the night skies were due to be spectacular.

It usually takes 3 hours to go from Aiguille du Midi to the Couvercle refuge but the lack of snow and the need to rope through the Salle a Manger on the Mer de Glace meant slow progress and in the end it took 6 hours. I was happy the sock felt the same as other merino socks and didn’t cause any problems such as heal rub. The heating element runs under the foot and although you initially feel it when you put the socks on, you soon get used to it and completely forget its there. The socks have 3 heat levels and I set them on the lowest during the tour and then went to level 2 later in the hut when the outside temperature dropped. The battery clips in place to stud fasteners on the top of the sock. The sock cuff then wraps over the top of the battery. Its worth taking the time to ensure the sock cuff is fully wrapped down over the battery as I found in the lift queue its quite easy for people to graze the outside of your leg and knock the battery. Once you are aware of this it’s easy to avoid. In comparison, other ski boot heaters I have used with batteries at the rear of the boot tend to get damaged/knocked off on chairlifts so it’s a better system.


DSC01996-2

Michelle Blaydon on the Leschaux Glacier with the Chamonix Aiguilles behind


DSC02005-2

Full moon over the Vallee Blanche


12631325_727116977392082_1595384911660522990_n

Ross Hewitt on the ‘roof’ of the Couvercle getting ready to ski down.


The next test planned was more onerous with an alpine climbing trip to the classic 700 m, TD- Fil a Plomb ice route (700 m, TD-) on the north side of the Rognan du Plan near Aiguille du Midi. I teamed up with Andy Houseman for this and as always, in the shady north faces, its pretty cold in the short December days. With the benefit of heated socks I chose my lighter, less insulated Scarpa Phantom boots to enable me to climb quicker. The test here was those periods standing belaying where you usually get cold feet pretty quickly. I set the battery to level 2 and was really pleased to find my feet stayed comfortable throughout the day. Without the heat socks this was definitely a day I would have used more insulated bigger boots which are less fun to climb in. We reached the cable car around 3 pm and after 7 hours on setting 2 my batteries were starting to fade but they had done the job brilliantly.

DSC02042

A thin, fragile initial pitch

DSC02053

Crux pitch of Fil a Plomb


Since then I have used the socks for the 3 days ski technique course that forms part of the training on the British Mountain Guides scheme. Training days tend to have some time discussing topics when you can get cold and I was pleased to keep my feet warm with the Lenz socks.

These tests have confirmed the socks are brilliant in ski touring and climbing boots and the element under the foot does not affect performance and is not felt after a few minutes.

Note : If you have world cup fitted race boots then the sock may be too thick to fit in the boot and you should check the fit with the boot.

Roll on 2 years. I am still using the same battery packs but changed socks in spring 2016 to the Lenz Heat Sock 5.0. This sock has the element running over the top of the foot and wrapping over the toes so there is nothing under the foot which can be noticeable in boots. Two seasons of hard use and I can confirm the sock is hard wearing and the system sufficiently robust for all the abuse I throw at it.

Whether I’m guiding at a more relaxed pace or having a big day on the Midi where you put your skis on in the tunnel and ski flat out to town, the heat socks are the only thing that stop my feet freezing as they plough through -30C snow and all the blood gets directed to my quads!

So to recap, the heat sock 5.0 works best in ski boots due to the element position and combine this with the RCB1200 or RCB1800 batteries depending on how long your days will be.  For alpinists definitely go for the RCB1800 which I use, for skiers doing half days then consider the RCB1200.


Plum Yak Binding Review

PLUM-YAK-top-epaul-du-tacul-ross-hewitt-1Photo courtesy of Cedric Bernardini.Ross Hewitt EntevesTest Riding Plum Yaks in a Sluff Fest on Col d’Entreves
Courm-2

My dilemma was that I wanted a super phat touring set up for short tours with under 800 m vertical gain but was wary of placing a low tech on a ski that measured 125 mm under foot. The wide ski places a lot of force on the binding reducing its fatigue life and increases the chance of the binding ripping out of the ski. Enter the Plum Yak which has a base plate 50 mm wider than the traditional Plum guide and a 75 mm drill spacing. Plum recommend this for all skis wider than 105 mm.

Haven’t heard of Plum? (pronouced PLUME). Plum are the Felisaz familly owned French brand located down the Arve valley from Chamonix. The 45 year old company has its traditions in CNC machining high tolerance components for the automotive industry and even Rolex. In the factory one see’s a quality controlled process that transforms aircraft grade aluminium from stock bar to the individual components.

The Plum Yak resembles the Guide in all other aspects except for the mounting plates which include a heal support so that load transfer to the ski is not restricted to the just the pins. The binding’s tough blue anodised finish draws the eye to the beautiful metal work that has gone into producing this binding. All the strength bearing components are machined from high quality aircraft grade aluminium which provide a stiff frame for power transfer from the boot to the ski. Indeed the toe pieces are crafted from a single billet of aluminium providing a noticeable increase in responsiveness and power transfer from edge to edge. Do remember this is a low tech binding and does not have the dynamic retention of an alpine binding, and I am not comparing it to them. That said I often ski good snow with these unlocked and have not experienced the pre-release problems that mean I have to ski Dynafit fully locked all the time. In any high consequence terrain I lock them out just the same. Remember to lube the lever every so often so it doesn’t get sticky. If you are out skiing and find you can’t lock the lever and don’t have any grease (why would you?),  just apply a tiny spot of sun cream to the area where the pin is. Also remember to check and/or loctite the base plate screws so they don’t work loose.

The Plum Yak resembles the Guide in all other aspects except for the mounting plates which include a heal support so that load transfer to the ski is not restricted to the just the pins. Especially nice if you jump. The heal post is rotated with a ski pole in the same way as a Dynafit Vertical ST but is bi- directional making it more ergonomic. A brake is also available if you need it.

All in all a strong and well made binding whose beauty lies in its simplicity. I skied it through 2014 season with no issues and am looking forward to getting back on them.

Forward and lateral release value 5.5 -12.                                                                       900 g pair (no brake)

Raised tow-piece to reduce ramp angle.
Built in crampon slot.
30mm heal adjustment rail.
For skis wider than 95mm waist.
CNC machined accuracy for a rigid frame.
Heel pad stiffens boot connection.


Scarpa Freedom SL Boot Review

If you looking for your next boot to deliver high performance ski mountaineering and downhill, this could be what you have always dreamt of.

Scarpa Freedom SL-6

For those who don’t know me I weigh 70 kg and have a background in skiing gates, freeride, ski mountaineering, steep skiing and Alpine climbing. Over the last 20 years I have used a number of touring boots including: red Scarpa Denalis, Scapa Denali XTs, Scarpa Matrix, Scarpa Spirit 4s, Dynafit Titans and until now was running Dynafit Vulcans this year.  My current alpine boots are Atomic Race 130s and Dalbellos.

My foot is a long low volume number with skinny heel/Achilles area usually fitting a 98 mm last.  You will have noticed from my list of boots that I have been using Dynafit for the last couple of seasons primarily in search of a closer fitting boot that suited my feet.  Volume reduction was required in the Scarpa Spirit 4 both under the foot and at the heal and in conjunction with a Dalbello tongue to provide a progressive flex it took me on many steep skiing adventures up to the toponeige grade 5.4 (sustained 50-55 degrees; fall you die type terrain).

So, it was with surprise that my foot felt so snug in the Freedom SL in what Scarpa claim is a 102 mm last. The fit along the front of my foot felt akin to alpine boots. The adjustability of the instep buckle combined with the alpine overlap design provides a good fit for a large range of feet. I’ve been testing a (mondo 27) 307 mm sole length which is slightly snugger than the 304 mm Vulcan and 317 mm Dalbello.

Weight wise both the Freedom SL and the Vulcan are coming in at 1800 grams per boot on my scales which means I can do up to 2000 m vertical below 4000 m altitude with a pair of 5.5 kg skis.

Scarpa Freedom SL

The boot comes with a mouldable Intuition tongue style liner to ensure a close fit. The liner has a hinge area below the calf for comfort while touring firmer foam around the upper to provide the support and power transfer you are used to on alpine boots. The base of the liner has a nice rubberised coating to give some grip when walking around a hut or hoping out of the tent to go relieve yourself.

The forward flex feels springy and progressive like an alpine boot and is controlled by the aluminium bar on the Achilles spine. Forward lean is adjustable from 14 degrees by +/- 4 degrees and the transition from walk mode is a simple flick of the switch.  A beefy aluminium bar engages in to a slot for ski mode which can be easily verified visually before committing your life to that first turn down a 1000 m 50-55 degree line.

Scarpa Freedom SL-4 Another improvement Scarpa have made in this area is the interface between the ski-walk mechanism and a rear crampon bail. I experienced a good crampon fit with both Sarken and Camp Nanotechs and I’m sure Grivels will be just as snug.  Also of note is the strong lateral construction of the upper cuff that enabled me to power a Volkl Katana 191 which is the stiffest ski I have.

The shell is moulded from Peebax Renew plastic and Scarpa have mastered the art of bonding plastic to carbon enabling a carbon core beam to be utilised in the shell sole to provide the backbone. With one type of plastic forming the main shell its easy for boot fitters to work with to get the ultimate fit. The boot has four clips with touring teeth on the cuff buckles and a powerstrap. Initially I thought the cuff buckles were a step backwards to the Titan era. The memory has not yet faded of loosing a lot of time at transitions trying to get the upper 2 buckles engaged to the touring teeth and not knowing what to do with the power strap.  The Vulcan and Mercury use a nice over centre cam top closure that has a tab which locks the boot in ski mode making it very fast going from one mode to another. The downside is the buckle sticks in walk mode and is more likely to be knocked while passing through rocks or mixed climbing. Back to the Freedom SL and I was pleasantly surprised to find that the large range of motion on walk mode meant I didn’t need to loosen the buckles much even when skinning on a flat glacier and with the buckles all sitting snug on the boot there was little chance of damaging them while skinning or climbing.  Also a set of teeth stop the power strap sliding up off the boot while touring which used to drive me crazy on the Titans. Slight tweaks to existence methods have produced a good result here.

The boot is designed with interchangeable soles units comprising a DIN sole for downhill bindings or a vibram rockered dynafit compatible touring sole. Scarpa have cleverly placed the heal dynafit interface in the boot shell rather than the sole to benefit from the shell stiffness. The soles are held in place by T nuts inserted on the upper side of the carbon bar in the sole which the 2 toe nuts moulded into the shell. This is a major improvement over old designs where interchangeable soles screwed into plastic could fail.

Scarpa Freedom SL-2The interchangeable sole feature adds a little weight and some will argue a reduction in rigidity but the upside is it makes this boot highly attractive for a one boot for both freeride and high performance ski mountaineering. One of my biggest frustrations is skiing one day in alpine boots then the next day heading into the Argentiere basin in touring kit and trying to anticipate how a boot will respond on the first turn on one of the basin’s many classic steep lines. Another difficult decision is what setup to take on that ski trip when baggage allowance comes into play or if you want the simplicity of a one boot quiver. Now you know. My final comment is that the boot is made to Scarpa’s usual high quality standards and most importantly looks rad in green and black with fluro yellow buckles.

Scarpa Freedom SL test Tacul Shoulder-3 Scarpa Freedom SL test Tacul Shoulder-14

Testing on the NW Shoulder of Aiguille du Tacul